The pan’s sizzling, and the aroma fills the kitchen. You can barely wait to dive into these salmon cakes with canned salmon, but there’s one problem—they’re disappearing fast!

Perfect for weeknights when you’ve got 20 minutes and zero plan, these easy cakes are a lifesaver. With canned salmon on hand, there’s no need for elaborate prep or cooking fresh fish. Just mix, shape, and fry for a satisfying meal that delivers big flavor without the fuss. Get ready to savor every bite!
Why You’ll Love This salmon cakes with canned salmon
- Super Easy: Just mix, form, and cook! No complicated steps, perfect for a quick weeknight meal.
- Flavor Packed: Savory and satisfying with every bite — it’s like a burst of ocean goodness in your mouth.
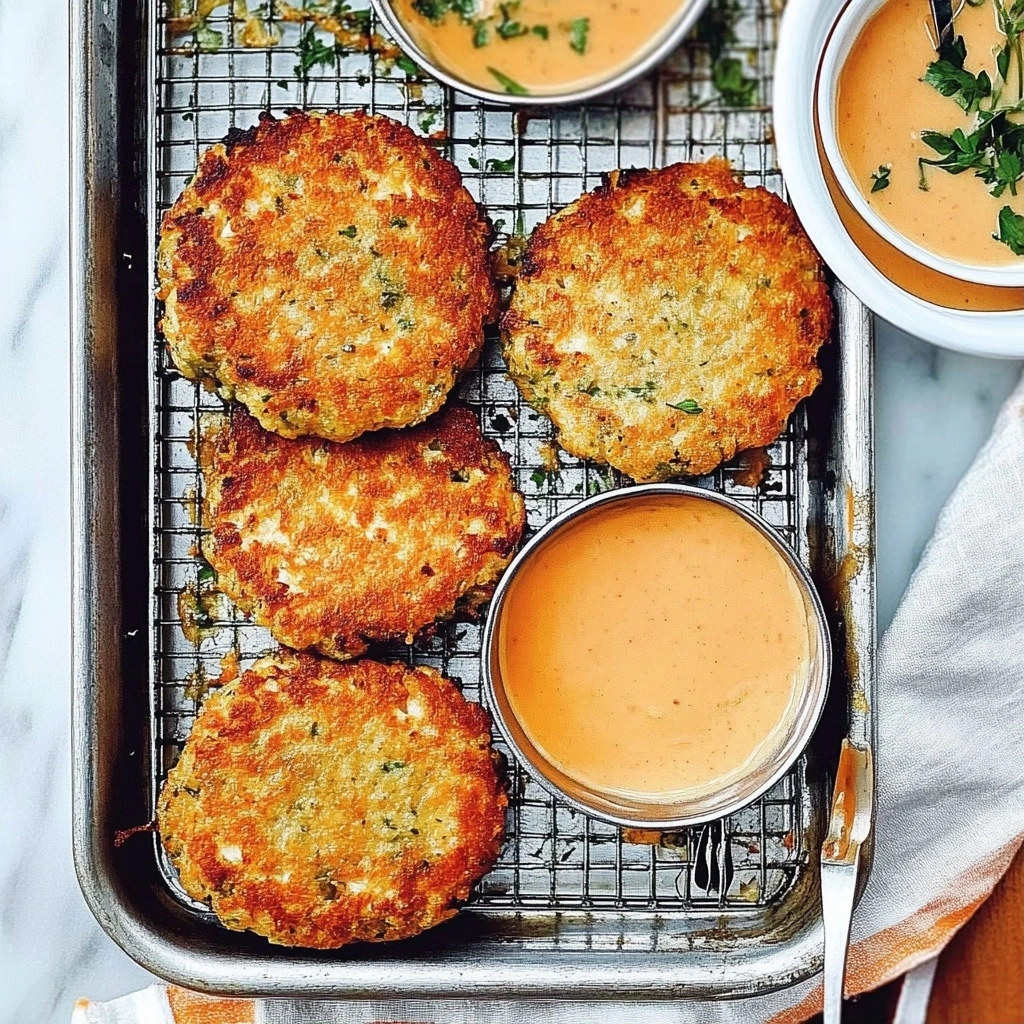
- Crisp-Tender Texture: Enjoy the delightful crunch outside while the inside remains soft and moist.
- Versatile Meal: Pair it with salads, rice, or pasta — it fits into any dish you have in mind!
- Surprising Benefit: It’s budget-friendly — canned salmon is an affordable protein option that’s still nutritious.
salmon cakes with canned salmon Ingredients

Canned Salmon Mixture:
- Canned salmon (2 cans) — opt for wild-caught for better flavor and nutrients.
- Bread crumbs (1 cup) — preferably panko for extra crunch; can substitute with crushed crackers.
- Egg (1 large) — beaten; helps bind the mixture together effectively.
- Dijon mustard (1 tablespoon) — don’t skip — it adds a tangy depth to the cakes.
- Mayonnaise (1 tablespoon) — adds moisture; Greek yogurt can be used as a lighter option.
- Worcestershire sauce (1 teaspoon) — enhances umami; consider soy sauce as an alternative.
- Lemon juice (1 teaspoon) — freshly squeezed gives the best brightness to the flavor profile.
- Dried dill (1 teaspoon) — fresh dill is great if you have it on hand for more aroma.
- Garlic powder (1 teaspoon) — offers a nice background flavor; fresh garlic works in a pinch.
- Onion powder (1 teaspoon) — brings sweetness; fresh onion can be finely chopped instead.
- Salt (1/2 teaspoon) — essential for balancing flavors; adjust according to taste preference.
- Black pepper (1/4 teaspoon) — freshly ground is best for optimal spice.
Cooking:
- Olive oil (2 tablespoons) — for frying, use a high smoke point oil like avocado if preferred.
*Full measurements in the recipe card below.*
How to Make salmon cakes with canned salmon
1. Mix Ingredients: In a large bowl, combine the canned salmon, bread crumbs, beaten egg, Dijon mustard, mayonnaise, Worcestershire sauce, lemon juice, dill, garlic powder, onion powder, salt, and pepper.
2. Form Patties: Shape the mixture into patties about 2-3 inches wide. You should be able to make around 8 cakes.
3. Heat Oil: In a large skillet over medium heat, add the olive oil and let it heat for about 2 minutes until shimmering but not smoking.
4. Cook Cakes: Carefully place the salmon cakes with canned salmon in the skillet and cook for 4-5 minutes per side until they’re golden brown and crispy on the outside.
5. Watch Out: Don’t walk away here — it goes from golden to burnt in about 30 seconds!
6. Drain Excess Oil: Once cooked through and crisped up nicely, transfer the cakes to a plate lined with paper towels to absorb any excess oil.
7. Serve Warm: Enjoy your delicious salmon cakes warm as an appetizer or main dish with your favorite dipping sauce or salad on the side! *Exact quantities in the recipe card below.*
How to Store salmon cakes with canned salmon
- Room Temperature: Keep salmon cakes with canned salmon out for no more than 2 hours in a covered dish.
- Refrigerator: Store in an airtight container for up to 3 days. Note that the texture might get a bit softer.
- Freezer: Freeze wrapped tightly in plastic wrap and then foil for up to 3 months. Just know that they may lose some moisture when thawed.
- Reheating: Reheat in the oven at 350°F for about 10-15 minutes until heated through and golden on the outside.
What to Serve with salmon cakes with canned salmon?
To balance the savory richness of this dish, consider lighter and brighter sides that enhance your meal experience.
- Crisp Green Salad: Try a salad with mixed greens and a lemon vinaigrette for acidity balance.
- Roasted Asparagus: This vegetable adds a delightful texture difference with its crunchy bite alongside tender cakes.
- Coleslaw: A tangy slaw provides a refreshing crunch; make it ahead in 15 minutes for easy serving.
- Tartar Sauce: The creaminess offsets the savory flavors, while its acidity brightens every bite.
- Quinoa Pilaf: Serve warm pilaf seasoned with herbs to add color contrast and nutty flavor in each mouthful.
- Sliced Avocado: Creamy avocado offers a smooth texture contrast; simply slice right before serving for freshness.
- Pickled Vegetables: Their tartness cuts through richness perfectly; prep them in advance to save time.
- Lemon Wedges: A squeeze of fresh lemon juice brings an instant brightness that elevates flavors beautifully.
salmon cakes with canned salmon Variations
Here’s how to play with this recipe and customize it to your taste.
- Spicy Kick: Add 1 teaspoon cayenne pepper with the other spices for a fiery twist.
- Herbed Delight: Mix in 1 tablespoon fresh parsley or cilantro into the canned salmon mixture for vibrant flavor.
- Lemon Zing: Increase the lemon juice to 2 teaspoons for a brighter, fresher taste.
- Cheesy Upgrade: Fold in 1/2 cup shredded cheese before frying for a melty, indulgent center.
- Gluten-Free Option: Substitute bread crumbs with gluten-free panko for a safe alternative.
- Zesty Flavor Bomb: Add 1 tablespoon capers to the canned salmon mixture for a tangy burst of flavor.
- Savory Twist: Incorporate 1 teaspoon smoked paprika with the other spices for a deeper, smokier base.
Make Ahead Options for salmon cakes with canned salmon
I like to prep my salmon cakes with canned salmon a day in advance. I mix all the ingredients and shape them into patties, then store them in an airtight container in the fridge. They hold up well for about 24 hours, but I wouldn’t recommend making them more than that ahead of time since they can become a bit mushy. Just before serving, I heat some olive oil in a skillet and fry them until they’re golden brown. The flavor is spot on, but the texture doesn’t quite hold if you leave them too long. Remember, crispy is key! Enjoy your cooking!
salmon cakes with canned salmon Recipe FAQs
Can I make salmon cakes with canned salmon ahead of time?
Absolutely! You can prepare the salmon mixture and form the patties ahead of time. Just cover them tightly and refrigerate for up to 24 hours before cooking. When you’re ready, heat your olive oil in the pan and cook them as directed. This saves you time on busy days, but be sure to let them sit out for a few minutes before frying for even cooking.
Why did my salmon cakes with canned salmon fall apart?
If your salmon cakes are crumbling, it might be due to not enough binding ingredients or too much moisture in the mixture. Ensure you’re using a large egg as a binder and consider adding an extra tablespoon of bread crumbs if they seem too wet. When forming patties, press them firmly so they hold together better while cooking.
What can I serve with this dish?
These salmon cakes pair wonderfully with various sides! A fresh green salad, tartar sauce, or a lemon-dill yogurt sauce enhance their flavors nicely. You could also serve them alongside roasted veggies or even in a sandwich for a delightful meal. Just keep in mind that lighter accompaniments help balance the richness of the cakes.
How can I tell when this recipe is cooked through?
You’ll know your salmon cakes are cooked perfectly when they’re golden brown on both sides, typically after 4-5 minutes per side. The internal temperature should reach at least 145°F (63°C) to ensure they’re fully cooked. Look for a crispy exterior and firm texture; if they’re still mushy inside, give ’em another minute or two in the pan!
Final Thoughts on salmon cakes with canned salmon
Salmon cakes with canned salmon are a fantastic way to whip up a delicious meal in no time. With just a handful of ingredients and minimal prep, you can enjoy a satisfying dish that’s packed with flavor. The combination of Dijon mustard, Worcestershire sauce, and fresh lemon juice brings out the natural richness of the salmon, making each bite memorable. If you’re looking for a quick weeknight dinner or a tasty lunch option, give these cakes a try. Let me know how yours turned out in the comments.
salmon cakes with canned salmon
Ingredients
Method
- In a large mixing bowl, combine the drained and flaked canned salmon, bread crumbs, beaten egg, Dijon mustard, mayonnaise, Worcestershire sauce, lemon juice, dill, garlic powder, onion powder, salt, and pepper. Mix until well combined.
- Using your hands, form the mixture into patties, about 3 inches in diameter and 1 inch thick.
- Heat olive oil in a frying pan over medium heat. Once hot, add the salmon cakes in batches, being careful not to overcrowd the pan.
- Cook for about 4-5 minutes on each side, or until golden brown and cooked through.
- Remove the salmon cakes from the pan and drain on paper towels. Serve warm with your choice of dipping sauce or a side salad.